For questions please contact Wendy Maynor at Wendy_Maynor@ncsu.edu
Helpful Hints for 4-H Presentation Videos
-All videos should be recorded horizontally if using your phone or tablet/ipad.
-Make sure your camera is set to HD
-Set it on a stable place (piling up books if you don't have a tripod) Ideally, the camera
should be set at your eye level.
-Make sure Autofocus and Auto Exposure are locked on the participant at the right distance
-Look directly into the camera lens and cover up your own picture if it's distracting.
-You can use bright stickers placed on either side of the lens if it's hard to get your focus
back to it
-If you're showing an item on camera, do it slowly, holding it in place while counting to at
least 5 in your head before putting it down
-Because things are often hard to see or concentrate on in a video when you are
holding it, one option would be to have a high-backed chair turned backward beside you so
that you can rest your arm on it while you're holding the object to make sure you're holding
the item still.
-Make sure the camera is at a direct line of sight with you or slightly above if you have
items on a table.
-If you are showing a powerpoint on a different computer, it may be hard to see the
computer screen on camera. The camera cannot expose for both you and the computer
screen with clarity and it’s going to pick the better light source (the computer).
-There are several options depending on your technology available:
--Set focus on you, move the camera to the computer if needed to the screen.
your presentation, the focus is on the presenter and their presentation.
your presentation, the focus is on the presenter and their presentation.
--Print slides out and film at a closer angle
--Film your presentation but stand to the side so that you will have enough room to
digitally add slides in later
digitally add slides in later
--Film with dual screen zoom
--Use Posters
-Face the window or another light source or you can set up outside to record your
presentation.
-If you have glasses, make sure that you can't see the reflection of the window in
them so that we can still see your eyes.
-Make sure you have a non-distracting background (not busy and not a lot of people
walking around behind it
-Use earbuds with a microphone to improve your audio if needed.
-If you are concerned with upload time, maybe upload it overnight.
Video Specifics
-Please save video’s as .mp4 or .mov These are universal files that we should be
able to download and watch.
-Videos should be 10GB or less. 6-8 is recommended based on the time limit that your
presentation should be. 7-12 minutes total.
Using Zoom to Record your Presentations
Presented by Sarah Moyer, Caldwell County 4-H Agent
-Free accounts allow families to use local recording feature - needs to be on desktop or
-Check recording settings prior to beginning a meeting.
-Locate “Record” on the menu bar.
-Locate “Record” on the menu bar.
The meeting host will see a “Recording…” indicator in the top, left-hand side of the
screen during recording.
screen during recording.

-After the meeting, the video will convert to an mp4, which is the file type we need.
-Other notes: You can assign recording privileges to a participant. The video file will be
named with “zoom” in it by default.
-So, this a good option for families who have a laptop/desktop, or if they can Zoom with a
staff member to record. It may not work as well if the internet connection is likely to be
interrupted during a recording.
-Setting up for a video… I moved my desk and had my laptop on a bookshelf in front of a
desk. Encourage youth to give some space between the device and themselves during
recording.
Using your Phone to Record 4-H Presentations
Taylor Jenkins, Iredell County 4-H
-Most everyone has an easily accessible camera in their back pocket... their phone!
-Turn your phone sideways and put it on airplane mode & do not disturb
-Audio is important—you can use a microphone, but you don't have to
-Make sure your environment is quiet and doesn't echo
-Use a tripod to hold your phone up or get creative
-The camera should ideally be eye-level (make sure you look into the lens!)
-Have someone help position you and video
-When presenting, pauses are okay!
-Pay attention to the clothing you wear—it makes a difference!
Step-By-Step Instructions for Adding Phone Camera to Zoom
Ashley Brooks, Craven County 4-H
-Make sure your phone and your computer are both up-to-date with software updates
-Plug in USB charging cable to computer and then plug other end of cable into phone
-If you have an iPhone the screen will ask you if you “Trust” the computer and if you do,
then type in the iPhone passcode (fingerprint and faceID will not work for this)
-Once your phone is plugged in, make sure you have completely updated the connection
software.
-Go to “Launchpad” and open “QuickTimePlayer” (your screen probably won’t
change except for the top toolbar)
-A window will open and you should see yourself through your computer’s built-in camera.
-Go to the toolbar on the lower screen (this toolbar is moveable if needed, but it will
appear at the bottom of the screen initially) & select the input from the iPhone’s camera,
(for Mac’s, FaceTime HD Camera will be ticked), select the iPhone Camera instead.

-The QuickTime screen should change shape to mirror your phone’s shape and should
show your phone’s screen. (Occasionally, iPhone’s will ask you to “Trust” the device again,
if this should happen, just type in your passcode again. If you are having to do this in front
of someone, don’t worry, it won’t show your passcode on the screen.)


-Open your phone and select your camera app
-Then select your “Video” tab (this will give you more visual screen)
-Now you’re ready to use your camera during zoom!
-You don’t have to tap/click record on either QuickTime or on your phone to use it on zoom.
But if you would like to, you can do it on either or both.
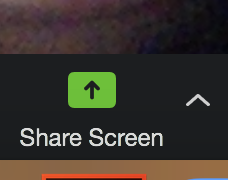
-Open “Zoom” and start your meeting.
-Click “Share Screen”
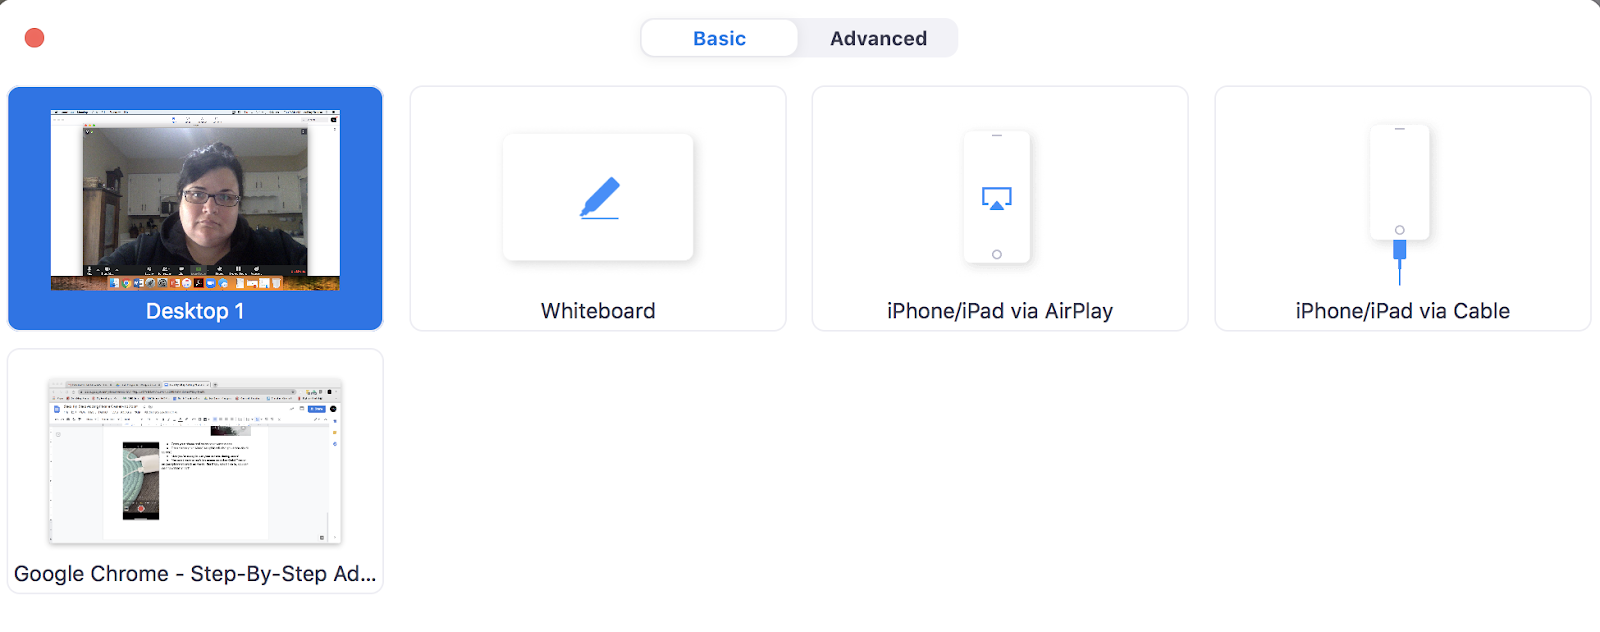 -When the window opens, it will display this first set of “Basic” options
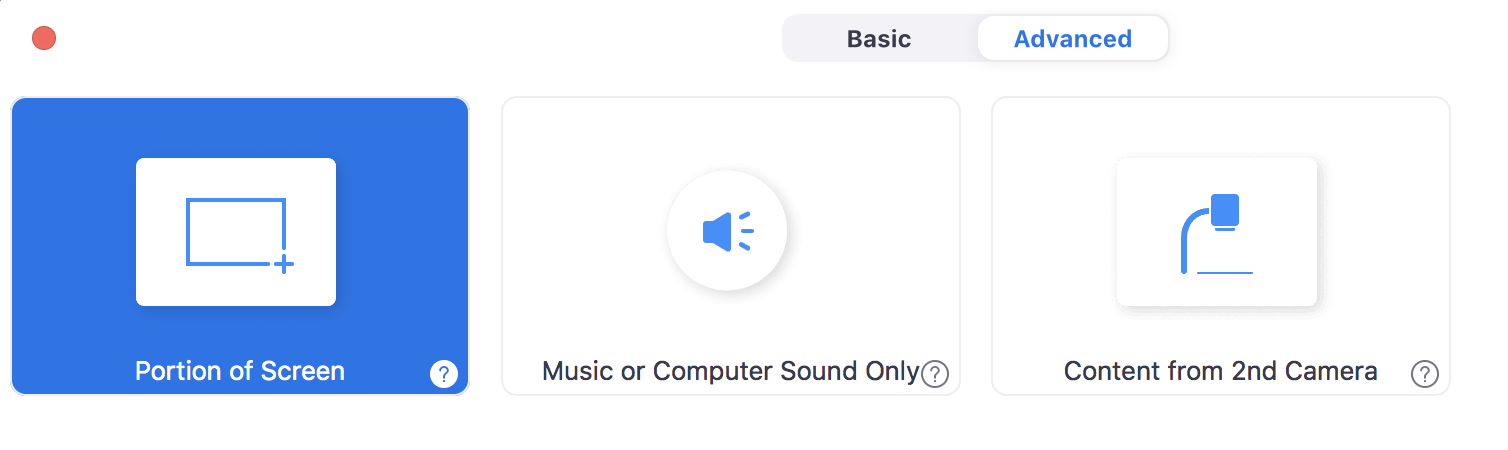
-You will need to select “Advanced” and then select “Portion of Screen” then click “Share”
-When the window opens, it will display this first set of “Basic” options
-You will need to select “Advanced” and then select “Portion of Screen” then click “Share”
-A green box will appear on your screen. Whatever is in this box is what the Zoom audience
will see.

-You can manipulate the size of the box by dragging the bottom right corner to fit to the size that
you want. You can slide the whole box over by grabbing the top and moving it. For example, you can
make it so that the people only see the middle of your phone recording on the screen.
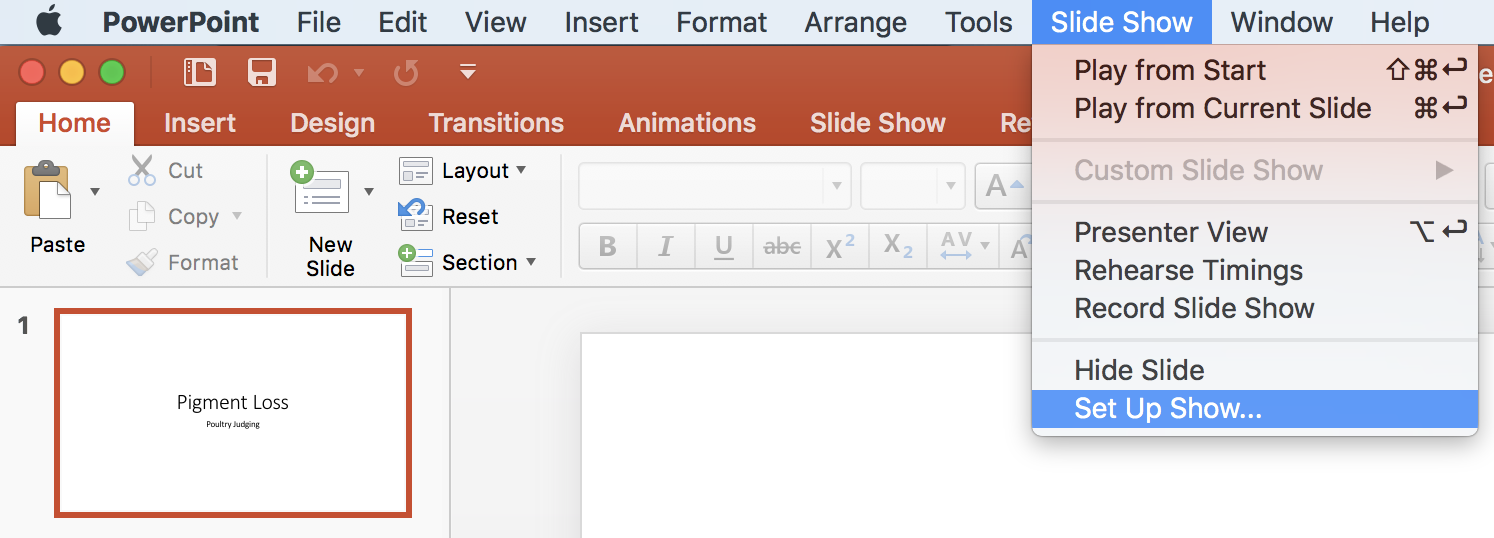
-You can also add a PowerPoint to the zoom session
-Open PowerPoint and select “Slide Show” from the toolbar, then select “Set up Show.”
-Another window will open up and select “Browsed by an individual (window)”, then “OK”
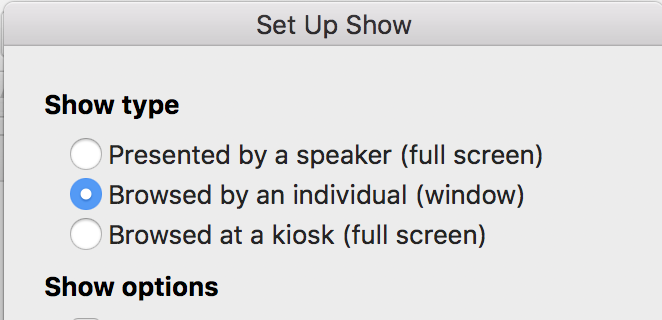
-Now you can start your regular slide show and it will open up in another window that does not
take up your whole screen.
-You will be able to manipulate the size of the window by clicking and dragging it at the bottom
right corner
-Should you want to make both your PowerPoint and your Phone camera visible at the
same time on Zoom, then you will need to make the Powerpoint window smaller and put it
beside the phone camera window.
-Now adjust the green box to fit the PowerPoint and the portion of the camera you want it to see.
Your screen should look something like this :

-Everyone else will be seeing the screen below: (the camera on your screen will be showing
images as well, I just put my camera down to take a screenshot, which is the reason for the
black screen above.)

Using other systems to connect a camera to Zoom
-Other notes: You can assign recording privileges to a participant. The video file will be
named with “zoom” in it by default.
-So, this a good option for families who have a laptop/desktop, or if they can Zoom with a
staff member to record. It may not work as well if the internet connection is likely to be
interrupted during a recording.
-Setting up for a video… I moved my desk and had my laptop on a bookshelf in front of a
desk. Encourage youth to give some space between the device and themselves during
recording.
Using your Phone to Record 4-H Presentations
Taylor Jenkins, Iredell County 4-H
-Most everyone has an easily accessible camera in their back pocket... their phone!
-Turn your phone sideways and put it on airplane mode & do not disturb
-Audio is important—you can use a microphone, but you don't have to
-Make sure your environment is quiet and doesn't echo
-Use a tripod to hold your phone up or get creative
-The camera should ideally be eye-level (make sure you look into the lens!)
-Have someone help position you and video
-When presenting, pauses are okay!
-Pay attention to the clothing you wear—it makes a difference!
Step-By-Step Instructions for Adding Phone Camera to Zoom
Ashley Brooks, Craven County 4-H
-Make sure your phone and your computer are both up-to-date with software updates
-Plug in USB charging cable to computer and then plug other end of cable into phone
-If you have an iPhone the screen will ask you if you “Trust” the computer and if you do,
then type in the iPhone passcode (fingerprint and faceID will not work for this)
-Once your phone is plugged in, make sure you have completely updated the connection
software.
-Go to “Launchpad” and open “QuickTimePlayer” (your screen probably won’t

change except for the top toolbar)

-A window will open and you should see yourself through your computer’s built-in camera.
-Go to the toolbar on the lower screen (this toolbar is moveable if needed, but it will
appear at the bottom of the screen initially) & select the input from the iPhone’s camera,
(for Mac’s, FaceTime HD Camera will be ticked), select the iPhone Camera instead.
-The QuickTime screen should change shape to mirror your phone’s shape and should
show your phone’s screen. (Occasionally, iPhone’s will ask you to “Trust” the device again,
if this should happen, just type in your passcode again. If you are having to do this in front
of someone, don’t worry, it won’t show your passcode on the screen.)
-Open your phone and select your camera app
-Then select your “Video” tab (this will give you more visual screen)
-Now you’re ready to use your camera during zoom!
-You don’t have to tap/click record on either QuickTime or on your phone to use it on zoom.
But if you would like to, you can do it on either or both.
-Open “Zoom” and start your meeting.
-Click “Share Screen”
 -When the window opens, it will display this first set of “Basic” options
-A green box will appear on your screen. Whatever is in this box is what the Zoom audience
will see.
-You can manipulate the size of the box by dragging the bottom right corner to fit to the size that
you want. You can slide the whole box over by grabbing the top and moving it. For example, you can
make it so that the people only see the middle of your phone recording on the screen.

-You can also add a PowerPoint to the zoom session
-Open PowerPoint and select “Slide Show” from the toolbar, then select “Set up Show.”
-Another window will open up and select “Browsed by an individual (window)”, then “OK”
-Now you can start your regular slide show and it will open up in another window that does not
take up your whole screen.
-You will be able to manipulate the size of the window by clicking and dragging it at the bottom
right corner
-Should you want to make both your PowerPoint and your Phone camera visible at the
same time on Zoom, then you will need to make the Powerpoint window smaller and put it
beside the phone camera window.
-Now adjust the green box to fit the PowerPoint and the portion of the camera you want it to see.
Your screen should look something like this :
-Everyone else will be seeing the screen below: (the camera on your screen will be showing
images as well, I just put my camera down to take a screenshot, which is the reason for the
black screen above.)
Using other systems to connect a camera to Zoom
.png)


No comments:
Post a Comment